Hollyhock is a garden plant famous for its beautiful, vividly-colored,ruffly flowers.

Hollyhock varieties
Hollyhocks come in various colors. There are also some dwarf varieties Adaptive to most any garden location, different varieties of hollyhocks are suited to either shade, partial shade or full sun. Many colorful varieties are also very drought tolerant, once established. Hollyhocks are truly beautiful, and there are a number of different varieties that you can choose from.
Alcea rosea
Alcea rosea is the most common type of cultivated hollyhock. These old-fashioned hollyhocks are tall and stately, blooming over a long summer season through the first frost.
Alcea ficifolia
Alcea ficifolia, commonly known as fig-leafed hollyhock, presents deeply lobed leaves and white- or cream-colored flowers. The plant produce an abundance of flowers from May through October. Fig leaf hollyhocks are resistant to hollyhock rust.
Alcea rugosa
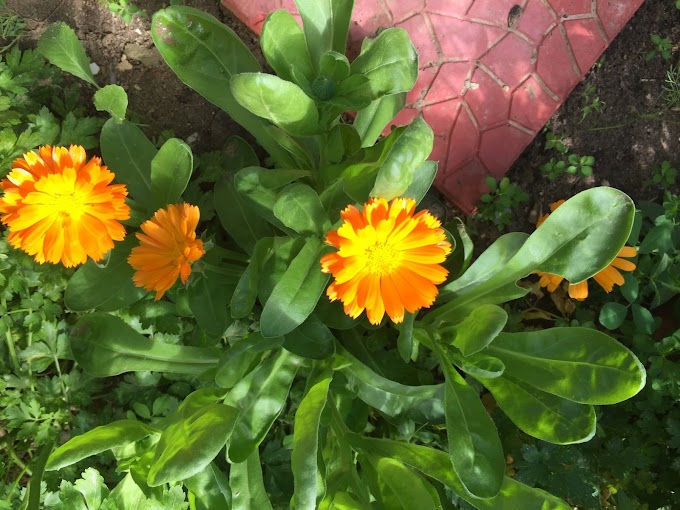
Alcea rugosa produces bold yellow flowers. The plant is very easy to cultivate and grows well in full sun or partial shade and prefer well-drained soil with a pH of 5.5 to 6.0.
Hollyhock flowers
Hollyhock with its big flowers is an old ornamental favorite, the flower spans about 3-5" when it is fully open. The flowers are produced on very long stalks that tower over the garden. They may need staking.

The flowers can be a variety of vibrant colors ranging from pink and red to white and yellow.

Where to plant hollyhock
Take your time to survey your garden to find places that will give your hollyhocks the sun they need to thrive. Find an area that receives full sunlight. Hollyhocks can tolerate partial shade as long as they get at least 6 hours of sun daily, but the flowers may be smaller and the colors not as vibrant. The plants are not fussy about soil type, but do best in a rich, well-drained spot.

If you’re not going to plant them up against a wall or fence, you must find a place that has enough space for the supports you’ll need for the tallest hollyhock varieties. If you are planting your hollyhocks in spring, you can till a lot of organic manure or compost into the soil as you prepare it for planting.
Watch how to add chicken manure to the garden soil video
The location should be in full sun and be sure to fertilize the plants every 2 to 3 weeks to encourage bigger blooms.
How to plant hollyhock
After hardening off hollyhock seedlings it's time for planting, caring and enjoying this remarkable, lovely attractive plant with it's flowers.
Just follow my tips and you will be rewarded with cascades of brilliant color throughout the summer season.

. Remove the seedling gently from its pot. Careful not to damage the tap root.

. Make a hole for the seedling in the soil.

. Slide the seedling into it and press the soil down around it.


. Plant the seedlings about 18 inches apart, then water them thoroughly. Make sure no water gets on the leaves.

Watch how to plant hollyhock in the garden video
Caring for hollyhock

. Keep the weeds down by mulching around the plants or by simply pulling the weeds up and out, and the best time to pull weeds out is right after watering or a rain, while the ground is loose.

. Water the transplants once a week to support the roots. The best time to water the plants is in the morning, and the worst time is at dusk. Watering this late in the day encourages disease.


The flowering stalks of the hollyhock, are covered in buds from the top all the way down to the rosette of foliage at the base. Once they are fully grown and ready to burst into color, these blooms start at the bottom and slowly work their way up, unfurling a little at a time. When spring comes, hollyhocks will grow rapidly, and you can encourage this growth with applications of liquid fertilizer every two to three weeks.
The beautiful And lovely flower spikes will then begin their glorious show. As the blooms continue to open, there will typically be several blooms per stalk all opening at once to create beautiful columns of rainbow-worthy color. Just remember that cutting the stalk back to the rosette of leaves at the soil level may produce a second flush of blooms.

Hollyhocks bloom continuously for several weeks during midsummer and may bloom into the fall. By removing the faded blooms from the stalk, you can force the plant to continue producing new blooms. After the growing season is over, Hollyhock should be cut back to ground level. To assure that the plant doesn’t get killed out completely, cover the area with mulch, in case the winter is real harsh. Many of my hollyhocks plants will continue to flower for more than two years without any special attention and care, and there are always younger hollyhock plants to take their place. Hollyhocks can be grown in a number of climates and environments, your plants will thrive if your garden provides them what they need most.
Common problems with hollyhock plants

You can minimize the common problems that occur when growing hollyhocks with a few precautionary steps:
. Remove any fallen leaves and other debris throughout the growing season to keep disease and pests to a minimum.
. Water plants early in the day, so leaves dry quickly and water at the base of the flowers instead of overhead to keep the foliage dry.
. Remove any infested leaves as soon as possible to keep your hollyhocks healthy throughout the growing season.
. Consider purchasing resistant hollyhock species
Keep an eye out for early symptoms of rust and other fungal problems. If you see a problem starting, just remove the affected leaves and burn them. Spores from fungus are spread easily by water and wind, so splashes from rain or a hose can spread the fungus to plants nearby. Always keep the foliage dry and water below leaves.
Collecting and saving hollyhock seeds

To harvest hollyhock seeds, simply snap the hollyhock seed pods off the stalks with your fingers, dropping them into a paper bag.

Hollyhock seeds are rather large and flat. Inside the pod, they tend to stick together, and you'll probably have to separate them from each other using your fingernails. If you are saving more than one type of seed, place them in labeled envelopes and then put the envelopes in a glass container, such as a Mason jar. Dried thoroughly and stored properly, hollyhock seeds will remain viable for a long time, more than 8 years!

Hollyhock seeds are rather large and flat. Inside the pod, they tend to stick together, and you'll probably have to separate them from each other using your fingernails. If you are saving more than one type of seed, place them in labeled envelopes and then put the envelopes in a glass container, such as a Mason jar. Dried thoroughly and stored properly, hollyhock seeds will remain viable for a long time, more than 8 years!

While they may be old-fashioned flowers, hollyhocks definitely deserve a spot in today’s gardens due to their tall stature and large, colorful blooms. I love growing hollyhock as it brings beauty to my Organic Garden!
Watch how to collect and save hollyhock seeds video
Hollyhocks are truly beautiful, and as you can see, there are a number of different varieties that you can choose from!
Now that you know how to plant hollyhocks and how to grow hollyhocks, you can grow these wonderful flowers in your garden it's so easy.
If you have any tips for growing Hollyhock, we'd love to hear them - please share them in the comments below.
If you have any tips for growing Hollyhock, we'd love to hear them - please share them in the comments below.
chokrihomeandgarden is a participant in the Amazon Services LLC Associates Program, an affiliate advertising program designed to provide a means for sites to earn advertising fees by advertising and linking to amazon. Some of the links to products on this site are affiliate links. These are products that i've used or recommend based from homesteading experience. I do make a small commission (at no extra cost to you) from these sales.(alert-warning)