Table of contents
Colorful stems and bright green leaves make chard the single most glamorous garden green as well as a nutritious vegetable. Because it does not ship well, you are not likely to find it at the grocery store. The best chard you will ever eat is that which you grow yourself, and fortunately it is easy to cultivate. In this step-by-step guide I will help you learn how to grow organic chard, so keep reading!
How to grow organic chard
Chard is one of the easiest and most satisfactory plants you can grow in a home garden. It is a close cousin to the beet, but has been selected over the centuries for its ability to produce abundant leaves, rather than roots. Chard, is becoming more popular thanks to the cultivars with brightly colored leaf stalks and the revival of interest in growing ornamental vegetables.
Chard is exceptionally easy to grow, making it a great choice for beginner gardeners looking for a no-fuss crop to get them started. Chard can tolerate cooler temperatures, so it can be grown in spring, fall, and even winter in milder climates.
There are a few differences for sowing seeds indoors or outdoors. The best tips for growing chard is to plant the seed early. By early, this means getting the seeds planted in early to mid spring. A spring planting will go on producing through spring, summer, and fall.
Indoors sowing seeds
Growing chard indoors from seed is very easy and germination rates are usually fairly high. You can get your seeds to perform even better, however, by soaking them in water for 15 minutes immediately before sowing.
Chard is easy to sow as the seeds are quite big !
- Fill the seed tray with compost and brush off any excess.
- When filling the tray rub the compost through your hands to break up any lumps.
- Give the tray a sharp bang on your table to settle and with your fingers make small depressions in each cell about a fingernail or 2.5cm deep.
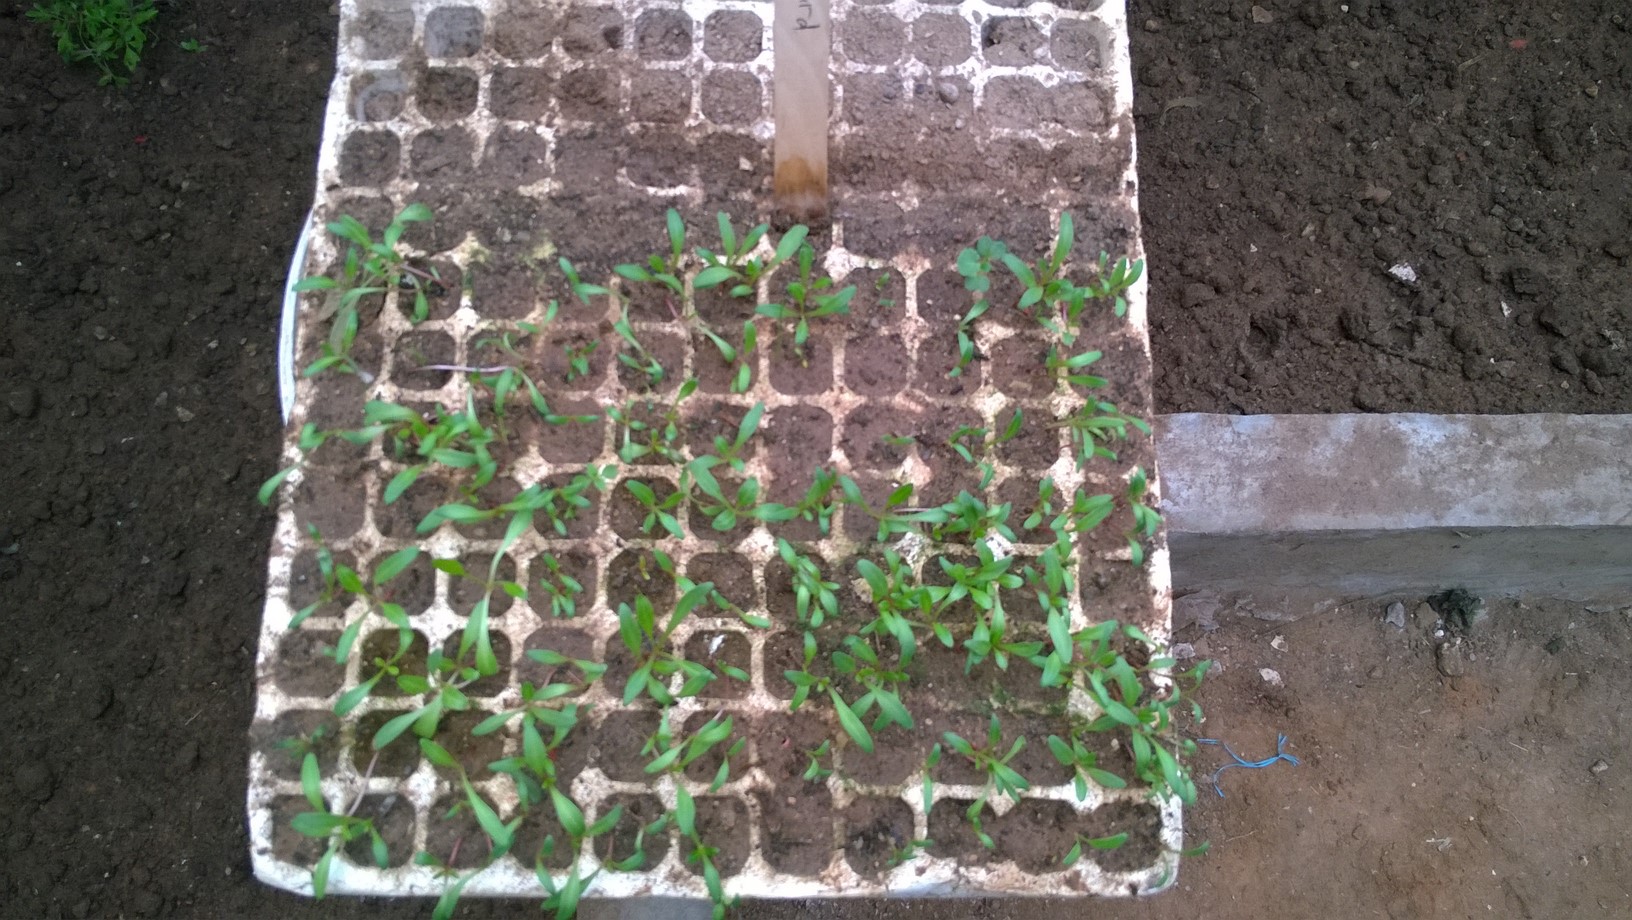
- Sow one seed per module which will produce 3-5 little plants.
- Push the seeds with a pencil or with your finger and cover the seeds with another layer of compost then scrape across the top of the tray with a stick to remove excess.
- Gently water your seeds.
- Place your trays in your greenhouse, cold frame or windowsill to germinate.
- In about 7-14 days, seeds will germinate and young sprouts will appear.
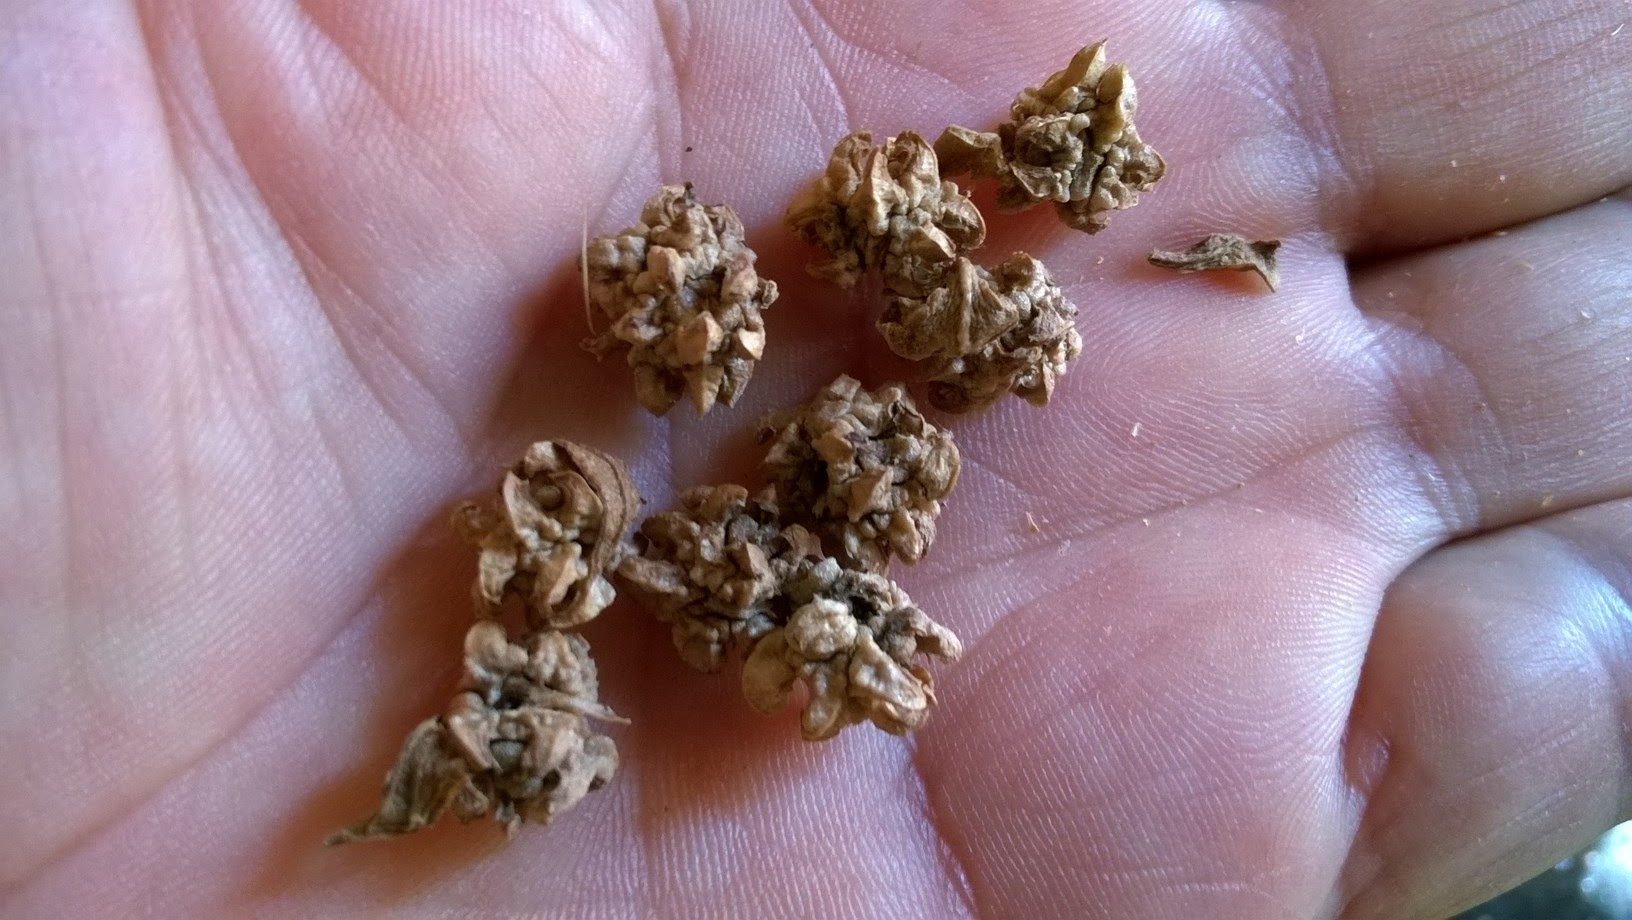
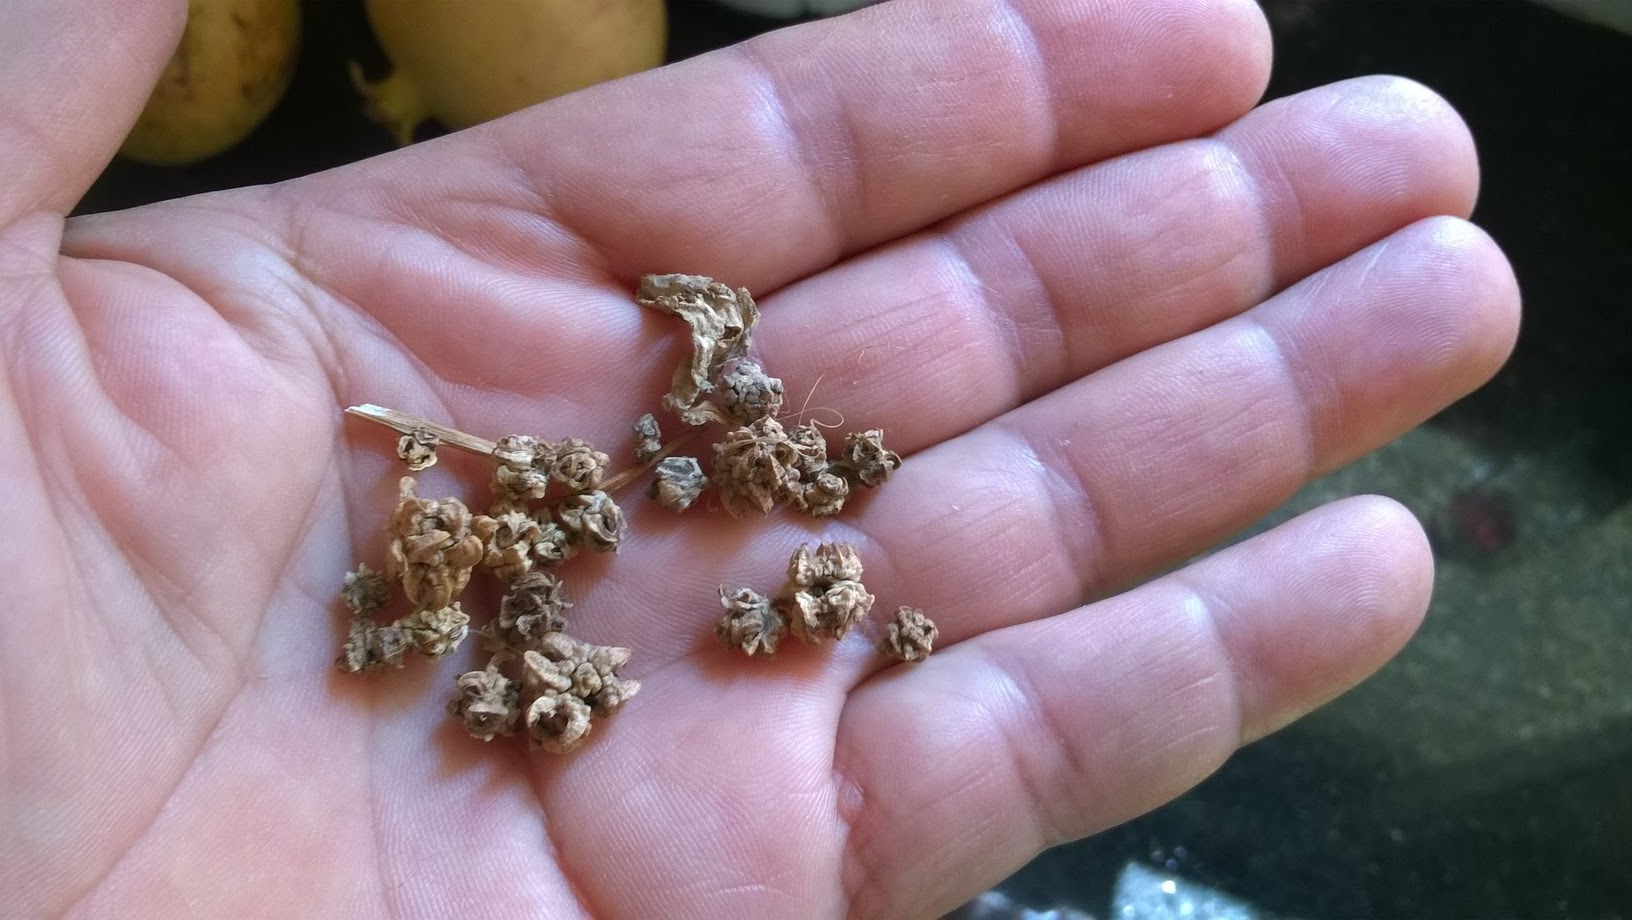
- Chard seeds are actually small clusters of seed which will produce from 3 to 5 little plants. You will need to thin out the weaker plants when they germinate and leave only one.
Hardening off means getting your plants used to more hostile outdoor conditions. Leave the plants outdoors on mild days, progressing to every day and finally all night.
Want to read: How to Harden Off Seedlings for Transplanting
Planting out seedlings
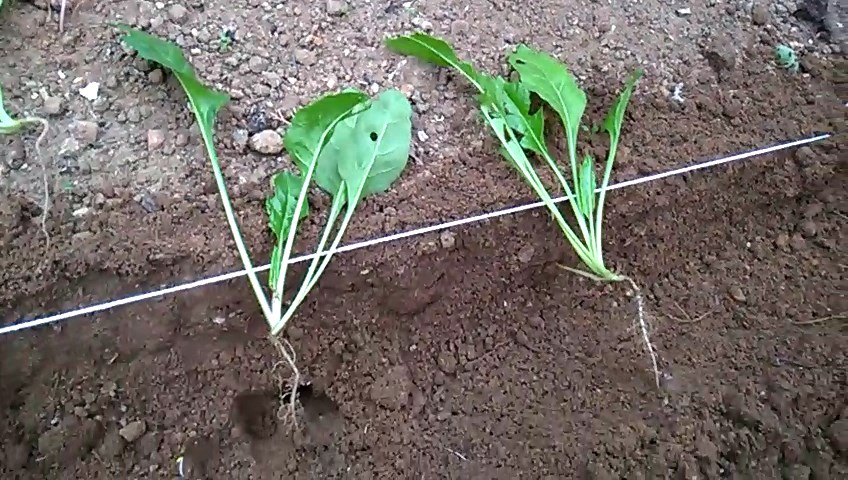
If you are growing your chard in modular trays now is the time to plant them out.
- Plant in a fertile well drained soil at this spacing : 30 cm between plants, 35 cm between rows.
- Make a planting hole the approximate size of the seedling plug with a trowel or dibber.
- Push the soil in around the seedling to form a good seal while avoiding pushing downwards and compacting soil.
- Water very well and gently your seedling.
Watch how to plant chard seedlings video
Sowing seeds outdoors
- Always start with good organic chard Seeds!
- Chard is a cool-season crop, so it's best sowing the seeds outdoors when the soil temperature is around 50 to 75°F (10 to 24°C). In most regions, this means sowing the seeds in early spring or late summer.
- Chard prefers full sun but can tolerate partial shade. Choose a location in your garden that receives at least 4-6 hours of sunlight per day. Remember that chard can occupy the same position for many months, so make sure you can afford to dedicate a suitable space for a longer period.
- Prepare the soil in the spring before sowing the seeds, by turning, creating a soft, rich loamy texture to at least a 4-6"depth, removing big stones, weeds and incorporating plenty of garden compost or well-rotted manure.
- Create shallow furrows in the soil, about ½ to 1 inch (1.3 to 2.5 cm) deep, using a hand shovel. Space the furrows about 12 to 18 inches (30 to 45 cm) apart.
- Sow chard seeds in the furrows, spacing them about 2 to 4 inches (5 to 10 cm) apart.
- Gently cover the seeds with soil, and lightly tamp it down.
- With a watering can water gently the area thoroughly. Ensure that the soil remains consistently moist during the germination period.
- Once the chard seedlings emerge and grow to a few inches tall, they will need to be thinned out. Thin the seedlings to about 6 to 12 inches (15 to 30 cm) apart to give them enough space to grow and develop.
- Keep the plants well-watered throughout the growing season, especially during dry periods.
Watch how to add chicken manure to the garden soil
- Apply a layer of organic mulch around the plants to help retain soil moisture and suppress weeds.
- For a constant supply of shard, try sowing a new row every three weeks to pick over winter.
- In the early growth stages, protect seedlings and transplants with a row cover.
- Spread mulch around seedlings to conserve soil moisture and keep weeds at bay.
Thinning chard seedlings
- Once the seedlings appear you will need to thin them out because each chard seed actually contains a little clump of several seeds which may all sprout.
. Thin them in stages until the plants are one foot (30cm) apart and leave the strongest seedlings plenty of space to grow. Thin the weaker seedling to leave the strongest one. Don’t pull up the seedlings you wish to discard, nip with your fingernail or a pair of scissors to avoid damaging neighboring roots.
Growing chard in containers
- Chard can also be grow in containers if you want a container garden or are limited on space.
- Choose a container that is at least 12 inches (30 cm) deep and wide to provide enough space for the chard's root system. Make sure the container has drainage holes to prevent waterlogging.
- Sow seeds directly into the container, following the recommended spacing on the seed packet.
- Gently press the seeds into the soil and cover them with a thin layer of soil.
- Water gently with a watering can. Keep the soil consistently moist but not waterlogged. Water the container whenever the top inch of soil feels dry to the touch. Avoid overwatering, as it can lead to root rot.
- Chard grows best in full sun or partial shade. Place the container in a location that receives at least 4-6 hours of sunlight per day.
Chard plants care
- Apply organic mulch such as compost to keep the soil cool and moist and to keep down weeds. Mulching will also help keep the plant leaves clean, reducing the risk of disease.
- Keep the soil around plants free of weeds and water plants in the soil every two weeks. Like all vegetables, chard does best with a nice, even supply of water.
- Water regularly, applying 1 to 1.5 inches of water per week if it doesn’t rain. Chard likes to stay moist. But too much water will cause disease. Best watering practice is a daily, light watering directly to the soil at the base of plants. However, pay attention to soil conditions. The soil should never stay completely dry.
- Remove any yellowing leaves at the base of the plant which will rot and can promote disease if not picked.
- Keep your chard plants weed free and well watered if the weather is dry. It is also a good idea to remove the lower leaves which will turn brown and rot.
- Regular watering will encourage plenty of fresh, leafy growth, and is essential in dry weather to stop the plants from running to seed, or ‘bolting’.
- If the plants start to produce tall central shoots or 'bolt' cut off any flower heads as they appear.
- If they reach this stage you have two choices, the first choice is that you can collect seeds for the next growing season and the second is that they should be dug up and added to the compost heap as they'll stop producing tender leaves.
Companion plants for chard
All plants from the brassica family like cabbages and broccoli as well as alliums like onions and garlic grow well with chard. Other plants which take well to chard as a neighbor are tomatoes, radish, and celery. On the other hand, melons, and potatoes don’t grow well with chard since they compete for nutrients in the soil.Harvesting chard
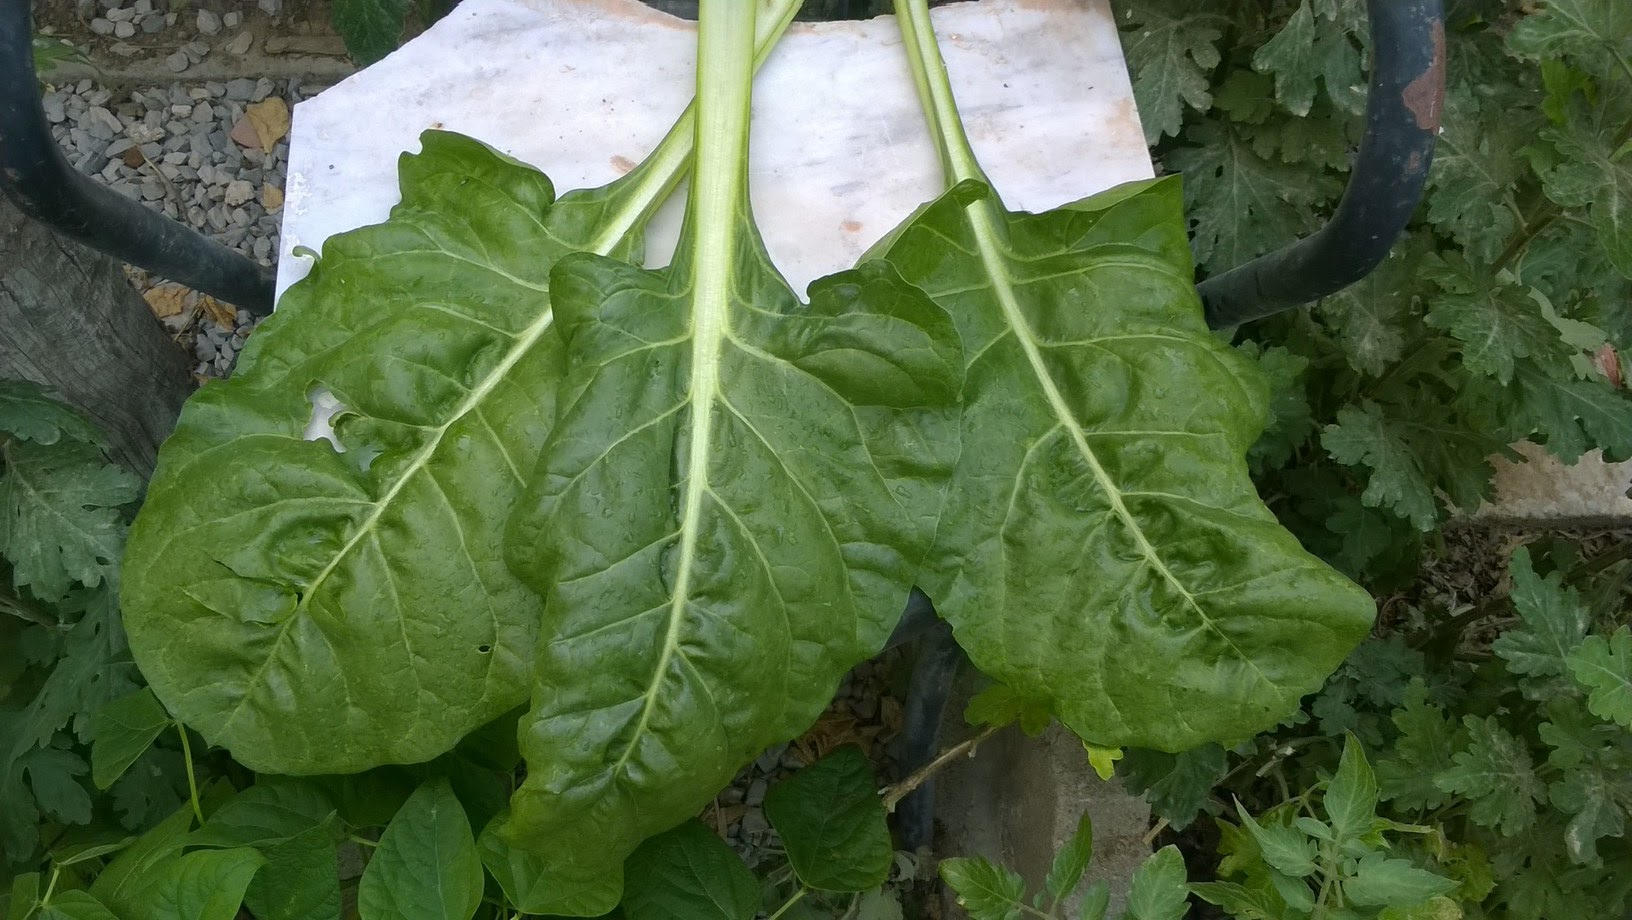
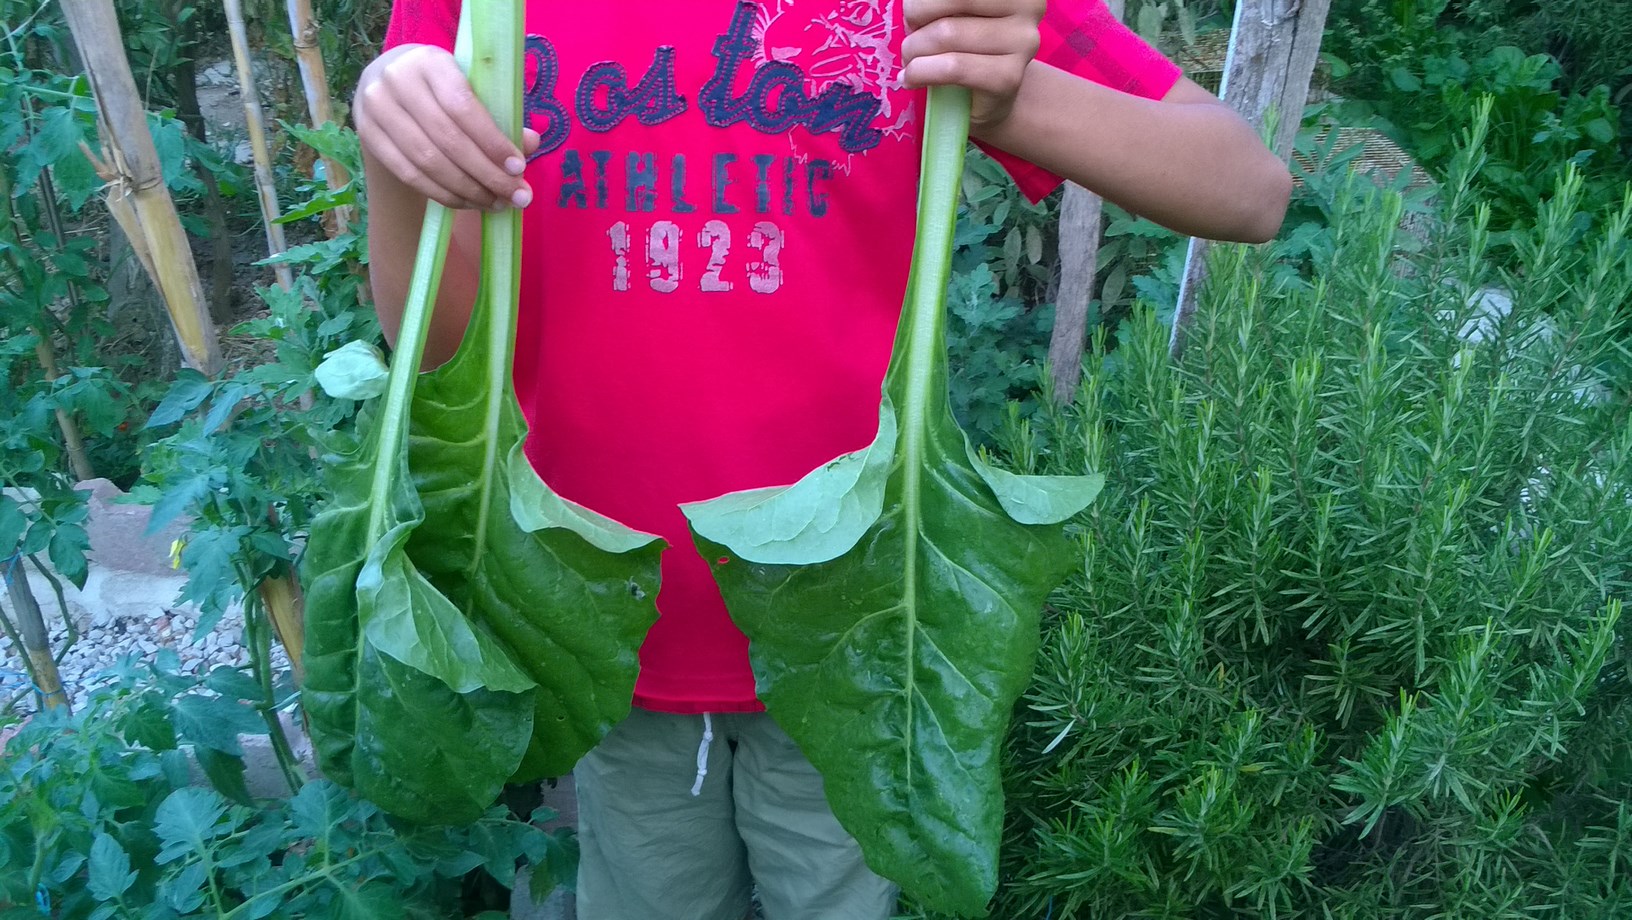
When the growing chard plants are 9 to 12 inches tall, you can start harvesting them. Start snipping and eating chard anytime after leaves form. To harvest mature chard, cut full-size leaves from the outside of the plant.
Watch in my garden video " My organic chard"
Take what you need by cutting leaves from the outside of the plant, taking care to avoid damage to the roots. By picking often, plenty of new leaves will be produced.
To enjoy multiple harvests throughout the growing season, only harvest outer leaves. First harvest at 30 days will be baby leaves. Plants will fully mature over the course of the next 30 days. Consecutive harvests of leaves after first harvest will deliver larger, lusher foliage. If you prefer to harvest the entire plant, cut young plants with a sturdy pair of small garden shears about one or two inches above the soil line. The root system will produce another cluster of leaves.
Collecting chard seeds
Chard is closely related to garden beets, and therefore is a member of the Chenopodiaceae family. B. vulgaris plants are biennials, so they require two seasons to produce seed. Also, they are wind-pollinated. Chard produces seed stalks similar to beets. Beets and chard will cross with each other, so avoid saving seeds from both crops in the same season.
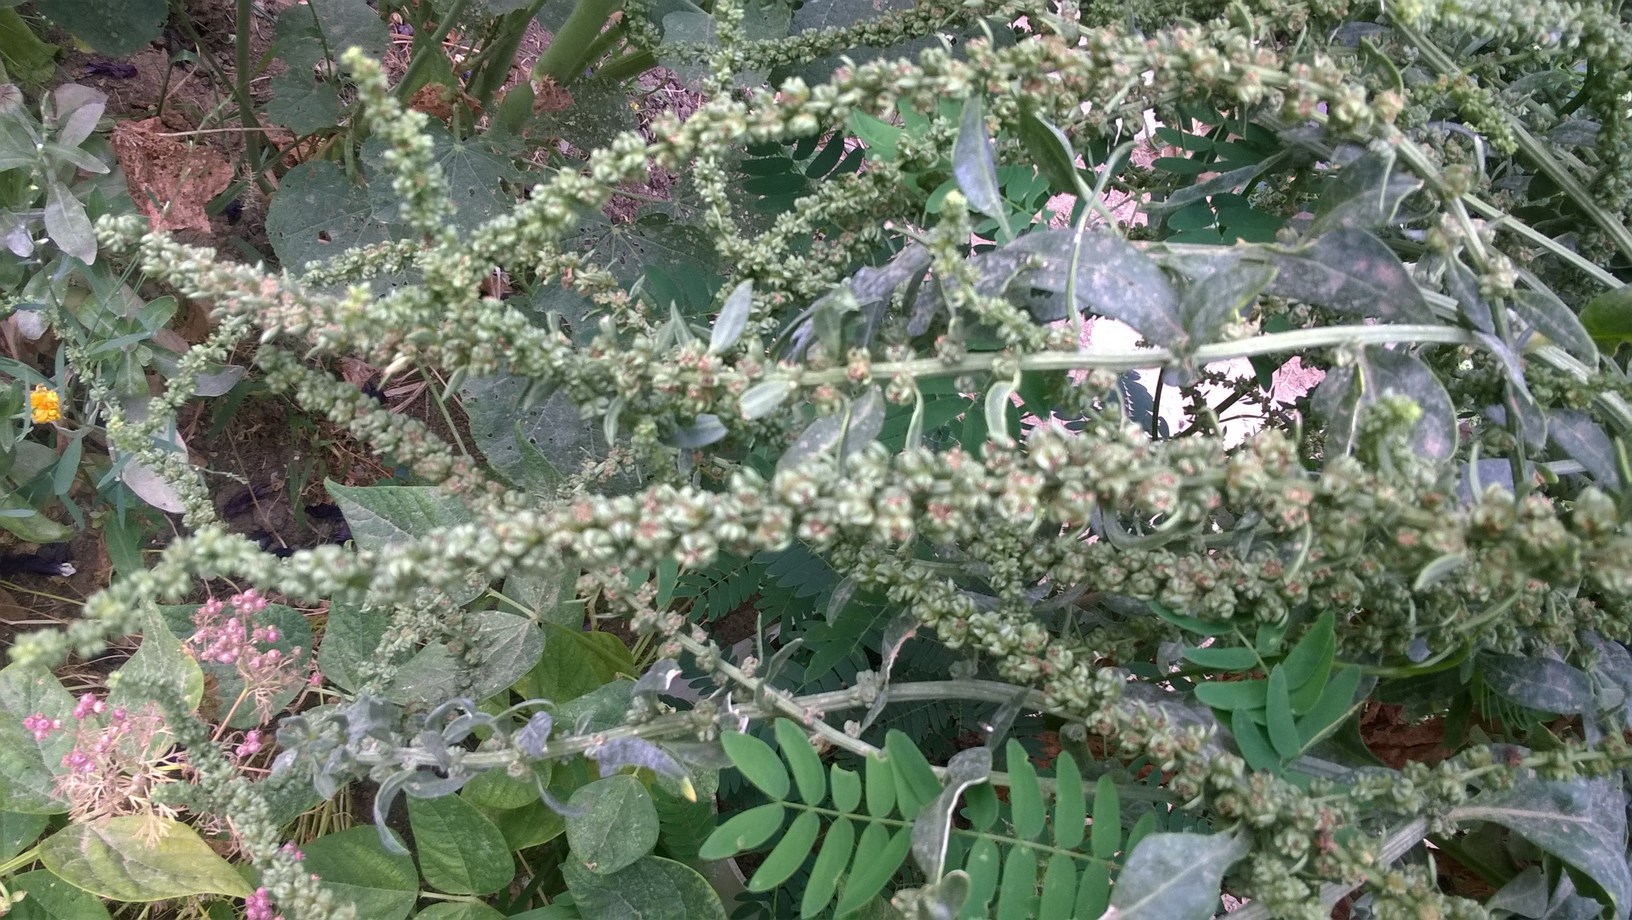
The first sign of seed production is bolting (the formation of a tall seed stalk), which happens in late spring when the temperature starts to rise. Then yellow-green flowers form, followed by seed capsules along the stem and when the stems turn brown. Small quantities of seed can be stripped by hand as seed matures.
This is the easiest way to collect chard seeds
- Collect the stems and seed capsules in a paper bag.
- Place a paper bag over the flower/seed cluster.
- Hold on to the top of the bag.
- Bend the stem over so the seed capsules are pointed downwards, then snap or cut the stem off.
- Fold the end of the bag to keep dust out and set in a cool dry place.
- The seeds will loosen and fall to the bottom over the course of a week or two.
Watch how to collect chard seeds video
How to store chard seeds
The secret to successful chard seed storage is “cool and dry.” places!
- Store the seeds in an airtight container in a cool and dry spot, away from any obvious heat source, and out of the sunlight. Try and store them at 4 – 10°C (40 – 50°F).
- If stored properly under cool and dry conditions, chard seeds can be expected to remain viable for 5 years.
While chard is relatively problem-free, be diligent about weeding and stay especially proactive about preventing early leaf-miner infestations. Between April and May, leaf miners lay eggs on the underside of leafy greens such as chard, leaving blotchy brown trails in the foliage.
Prevent these hungry critters from depositing their eggs by covering your chard with a floating row cover. Cut away infested leaves. Chard is quick to recover and fast-growing, so any damaged plants should spring up again in no time.
Good tip
Prevent leaf-miner infestations by planting chard in an area far from spinach and beets and in a location where spinach, beets, and chard have not been grown for two years.
I have been growing chard with very little trouble and have always relished it with my family!
Chard is the perfect leafy green for every Fall garden it's delicious, nutritious and easy to grow . If you want to add more lovely and nutritious vegetables to your spring garden? Growing Organic Chard should be on the top of your list!
If you have any tips for growing organic chard, we'd love to hear them - please share them in the comments below.
Don’t forget to follow us on Facebook, Instagram, Pinterest, and Twitter for more smart Organic Gardening Ideas and Tips!
🛒 Buy Quality Chard Seeds 🛒
This web site is a participant in the Amazon Services LLC Associates Program, an affiliate advertising program designed to provide a means for sites to earn advertising fees by advertising and linking to amazon. Some of the links to products on this site are affiliate links. These are products that I've used or recommend based from homesteading experience. I do make a small commission (at no extra cost to you) from these sales.(alert-warning)


