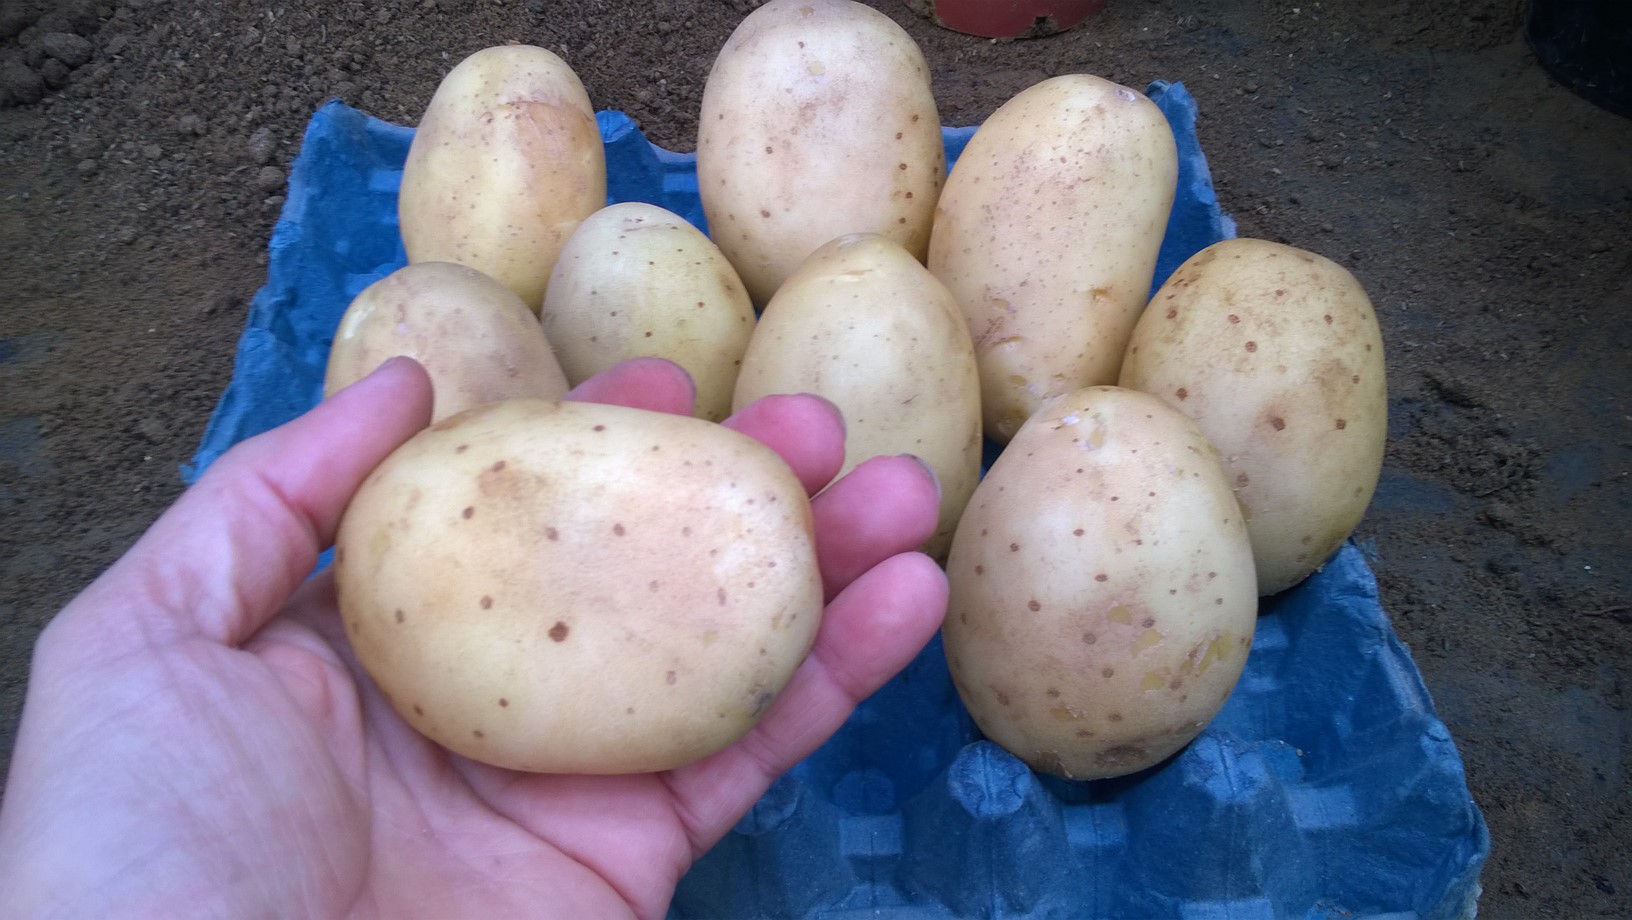
Potatoes are relatively inexpensive to purchase, but freshly dug potatoes have a flavor all their own and you have hundreds of different varieties to choose from. There are actually over 1,000 different varieties of potatoes available for growing. Store-bought potatoes are often treated to reduce sprouting, or are not the best varieties for all parts of the country. For these reasons, it is very important to start with “certified seed potatoes” which are disease-free. Interesting varieties can be found online, but the best varieties for your area are usually sold at the right season to plant at area garden centers. Potatoes are a great investment in space and time that will give every gardener a tasty reward that can be stored for months.
How to Grow Potatoes
Chitting Potatoes
When you receive your seed potatoes, set them out in a cool, dry and bright position to allow them to start sprouting (this process is called chitting). Aim to start chitting your potatoes 6 weeks before you plan to plant them.
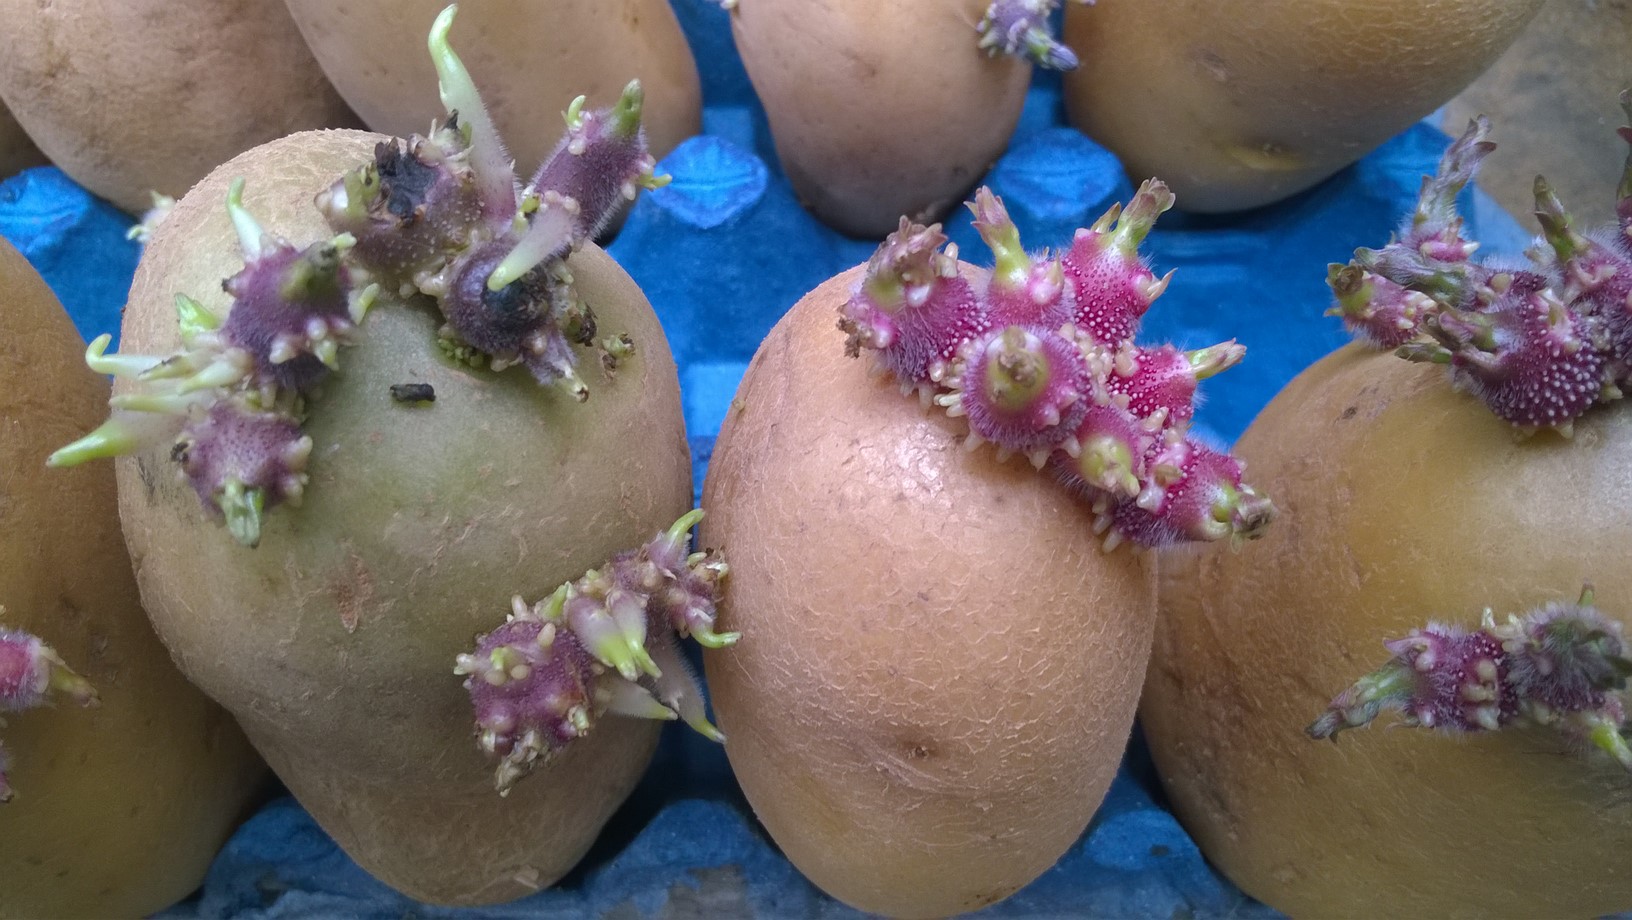
From late January/ February, chit your seed potatoes by setting them out in seed trays, shallow boxes or empty egg cartons in a cool, bright, frost free position (10C/ 50F) to allow them to sprout. You will notice that the immature 'chits' are all at one end (called the rose end). Place the rose end upwards. Sturdy 'chits' will form and should attain up to 25mm (1") in length.
Seed potatoes, benefit from 'chitting' prior to being planted. This will cause the eyes of the seed potato to start sprouting. The sprouts should be small, knobbly, and green/purple in colour. If you end up with long, white coloured sprouts, it means there’s not enough light, or you’re sprouting shop bought potatoes. This process encourages strong shoots to sprout over several weeks to encourage faster growth and heavier crops once they in the ground.
Once each of your seed potatoes have got 2-3 good sized ‘chits’ or sprouts on them, it’s time to plant them out in soil, whether you grow them in the ground or in containers. If any tubers have more than 3 chits/sprouts on them, rub the excess off. This is to ensure a better harvest, as there will be less underground shoots to share the goodness sent underground by the plant, so you might get less tubers, but the ones you get will be bigger.
Watch How to Chit Potatoes Video
Preparing The Soil to Plant Potatoes
Adding Organic Chicken Manure to The Garden Soil Video
Planting Potatoes
If you'd like to plant your potatoes in the ground, then simply break up the soil with a garden fork and dig in some organic matter such as compost or well rotted manure. Plant your 'chitted' potatoes 30cm (1') apart for first and second Earlie's and 45cm apart for main crop types. Rows should be set out 60cm (2') apart. Plant your potatoes with the sprouts upright, at a depth of about 10-15cm (3-6 inches). Cover the potatoes with soil and water them in. It is so important to earth up potato crops as the shoots emerge above ground, to protect them from frosts which blacken the shoots and delay production. Simply draw some soil over the top of the shoots to cover them again.
Once the plants are 25cm (10 inches) tall, draw up the soil around them about half way up the stem. This is called 'earthing up' and prevents potatoes near the surface from turning green and inedible. It is so important to earth up potato crops as the shoots emerge above ground, to protect them from frosts which blacken the shoots and delay production. Simply draw some soil over the top of the shoots to cover them again.
Planting Potatoes In Bags
Not everyone has space for planting potatoes, in fact not everyone has a garden. However, just about everyone can enjoy harvesting a few of their home grown potatoes in summer using old plastic compost bags, plastic bags or you can purchase Potato Planter Bags from Here. The potato is a favorite and versatile food that proves easy and inexpensive to grow. Home gardeners traditionally hill potatoes to encourage them to produce lots of roots and hence lots of tubers. This method takes some space and there is a high probability that you won’t get all the spuds out of the earth when you harvest.
Grow bags for potatoes are an excellent solution for patio or small space gardeners. The bag lets the plant spread out its roots and you can still add layers of soil. The reason for layering is the same as hilling. Potato tubers send out roots at the eyes, which branch out in soil. The more you cover the top of the root zone, the more roots they send out. More roots equal more potatoes.
- Prepare potatoes by letting them sprout several days before planting.
- Place the bag in a sunny place in your garden, patio or other growing spot.
- Roll down the sides of the bag.
- Make holes in the bottom of the bag for drainage.
- Fill the bottom of the bag with good organic soil mix.
- Plant potatoes about 2-3” deep in little hills with sprouts facing up.
- Cover potatoes with soil mix and water.
- Keep plants watered, but not wet.
- When the leafy shoots are about 6-7” tall, roll the trash bag up a bit and add soil mix to cover all but the top few leaves. As the plants grow, repeat this process, keeping the potatoes buried and mulched.
- Keep soil watered, but not soggy.
- When the leaves on the plants turn yellow and the foliage starts to dry, stop watering so the potato skins can dry.
- To harvest potatoes, carefully cut the side of the trash bag and remove potatoes.
Watch How to Plant Potatoes in Containers
Common Potatoes Problems
.Potato blackleg
Potato blackleg is a common bacterial disease which causes black rotting at the stem base. Initial infections cause stunted growth and yellowing stems. If tubers form, the flesh may be grey or brown and rotten.
Remove and destroy infected plants. Rotate crops. Buy resistant varieties such as Charlotte, Pixie and Saxon.
Remove and destroy infected plants. Rotate crops. Buy resistant varieties such as Charlotte, Pixie and Saxon.
. Potato rot
Potato tuber rots are a frequent cause of losses prior to, or after, lifting. Significant problems often follow a wet growing season, particularly if the tubers are then lifted from wet soil.
Use good quality, resistant certified seed tubers when planting and harvest when the soil is neither wet nor very hard and dry. Store in cool, dry conditions.
Use good quality, resistant certified seed tubers when planting and harvest when the soil is neither wet nor very hard and dry. Store in cool, dry conditions.
. Potato Scab
Common Scab leaves corky lesions on the skins of potatoes and limits their storage potential. Whilst this disease does not affect the taste and can easily be peeled off, it does make potatoes less visually appealing. It is caused by a bacteria that is often present in manures and is exacerbated in limy and sandy soils, and under dry conditions.
Common Scab on potatoes is best controlled by improving poor soil conditions with the addition of organic matter and by keeping potato crops well watered throughout the growing season. Use any infected tubers first and do not store them.
Common Scab on potatoes is best controlled by improving poor soil conditions with the addition of organic matter and by keeping potato crops well watered throughout the growing season. Use any infected tubers first and do not store them.
. Slugs
Slugs cause damage to both the foliage and to the developing potato tubers. Damage is fairly obvious as the culprits are easily identified by the silvery slime trails that are left around the plant foliage and on the soil surface.
There are a multitude of ways to kill slugs and snails including homemade remedies such as beer traps.
There are a multitude of ways to kill slugs and snails including homemade remedies such as beer traps.
Harvesting Potatoes
Start to harvest first earlies as 'new potatoes' when the plants begin to flower, approximately 10 weeks from planting. Tubers will generally become larger the longer their growing period. Main crop varieties are usually left for at least two weeks after the leaves and haulms (stems) have withered, to allow the skins to set. Cut down the stems with secateurs to just above soil level as the leaves wither and yellow, or if they show signs of blight.
Storing Potatoes
The taste and texture of fresh potatoes are very different than those you buy from the store. Enjoy the Rewards of Growing Your Own Potatoes!
This website is a participant in the Amazon Services LLC Associates Program, an affiliate advertising program designed to provide a means for sites to earn advertising fees by advertising and linking to amazon. Some of the links to products on this site are affiliate links. These are products that I've used or recommend based from homesteading experience. I do make a small commission (at no extra cost to you) from these sales.(alert-warning)


