The Complete Beginner-to-Expert Guide
There’s something incredibly satisfying about walking into your garden, lifting a leafy green plant, and discovering clusters of bright yellow wax beans hanging underneath like hidden treasure. Freshly picked yellow dwarf wax bush beans are crisp, buttery, tender, and packed with flavor in a way grocery store beans simply cannot match.
If you’ve never tasted a sun-ripened yellow wax bean straight from the garden, you’re missing one of the easiest and most rewarding vegetables you can grow at home.
The best part? These productive little plants are beginner-friendly, fast-growing, and perfect for organic gardening. Even if you only have a small backyard garden, raised bed, or compact growing space, you can still harvest baskets of delicious beans all season long.
In this complete guide, you’ll learn exactly how to grow organic yellow dwarf wax bush beans successfully from seed to harvest. We’ll cover soil preparation, sunlight requirements, watering, fertilizing, pest control, harvesting tips, companion planting, common mistakes, and the powerful “cluster planting” method that can dramatically improve your yields.
By the end of this guide, you’ll have everything you need to grow healthy, productive wax bean plants organically and enjoy a massive harvest right from your backyard.
(toc)(Table of Content)
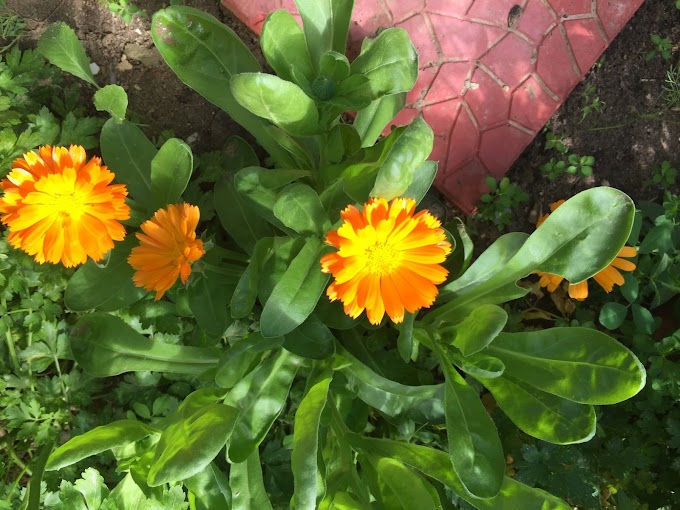
What Are Yellow Dwarf Wax Bush Beans?
Yellow wax beans are a type of snap bean harvested while the pods are still tender and immature. Unlike green beans, wax beans produce beautiful golden-yellow pods that are mild, sweet, crisp, and buttery in texture.
“Dwarf” or “bush” varieties grow in compact mounds instead of climbing tall vines. That means:
- No trellis is required
- They’re easy to grow in small gardens
- They mature quickly
- Harvesting is simple
- They’re perfect for beginners
Bush beans typically grow 16 to 24 inches tall and produce heavily over a short period, making them ideal for fresh eating, freezing, and preserving.
Some popular yellow wax bush bean varieties include:
- Golden Wax
- Cherokee Wax
- Rocdor
- Carson Wax
- Pencil Pod Wax
- Gold Rush Wax Bean
These beans thrive in warm weather and can produce a generous harvest in as little as 50 to 60 days after planting.
Why Grow Yellow Wax Beans Organically?
Growing organically means avoiding synthetic fertilizers and harsh chemical pesticides while building healthy living soil naturally.
Yellow wax beans respond exceptionally well to organic gardening practices because they are naturally vigorous plants that don’t require excessive feeding or complicated maintenance.
Benefits of growing organic wax beans include:
Better Flavor
Homegrown organic wax beans are sweeter, crisper, and more flavorful than store-bought beans.
Healthier Soil
Organic matter like compost and aged manure improves soil structure, moisture retention, and beneficial microbial activity.
Safer Food
You know exactly what went into your food and what didn’t.
Better Pollinator Activity
Organic gardens attract bees and beneficial insects that help improve overall garden productivity.
Budget-Friendly Gardening
Beans are inexpensive to grow and highly productive, making them an excellent crop for saving money on groceries.
Choosing the Perfect Location
Before planting your beans, selecting the right growing spot is critical.
Yellow wax bush beans absolutely love sunshine.
Sunlight Requirements
Choose a location that receives:
- 6 to 8 hours of direct sunlight daily
- Morning sun if possible
- Good airflow
- Warm soil conditions
The more sun your bean plants receive, the better your harvest will be.
Insufficient sunlight can lead to:
- Weak growth
- Fewer flowers
- Lower yields
- Increased disease problems
If you’re gardening in a hot climate, slight afternoon shade can help during intense summer heat, but full sun remains ideal.
The Importance of Healthy Soil
Great beans start with great soil.
Beans may not be as heavy-feeding as tomatoes or corn, but they still need fertile, well-draining soil to produce abundantly.
The secret to strong wax bean plants is creating rich, biologically active soil before planting.
Preparing the Garden Bed
Proper soil preparation can make the difference between weak plants and an explosive harvest.
Step 1: Clear the Area
Remove:
- Weeds
- Grass
- Rocks
- Old plant debris
This prevents competition for nutrients and reduces pest problems.
Step 2: Loosen the Soil
Use a garden fork, broadfork, or shovel to loosen the top 6 to 8 inches of soil.
Loose soil helps:
- Root development
- Drainage
- Air circulation
- Water absorption
Avoid compacted ground because beans dislike soggy roots.
Step 3: Add Organic Matter
This is where the magic happens.
One of the best soil amendments for wax beans is aged composted chicken manure.
Well-composted chicken manure acts like “black gold” in the garden because it contains:
- Nitrogen for leafy growth
- Phosphorus for root development
- Potassium for pod production
- Beneficial microorganisms
Spread a generous layer over the garden bed and mix it into the top few inches of soil.
Avoid using fresh manure because it can burn seedlings and introduce harmful pathogens.
Understanding the Cluster Planting Method
Most gardeners plant bean seeds individually in straight rows.
But there’s a better way.
One of the easiest methods to increase yields and improve germination is called cluster planting.
Instead of planting one bean seed per hole, you plant multiple seeds together in small groups.
This technique offers several advantages.
Benefits of Cluster Planting Wax Beans
Improved Germination Success
Not every seed germinates perfectly.
Planting 4 to 5 seeds together increases your chances of successful sprouting.
Natural Plant Support
The plants grow together and help support each other naturally, reducing flopping.
Higher Yield in Small Spaces
Cluster planting maximizes productivity in compact garden beds.
Better Moisture Retention
Grouped plants help shade the soil surface and reduce evaporation.
Stronger Weed Suppression
Dense plantings make it harder for weeds to establish themselves.
How to Plant Yellow Wax Bean Seeds
Now comes the fun part.
Step-by-Step Planting Instructions
Step 1: Dig Planting Holes
Using a hand trowel, create holes approximately:
- 1 inch deep
- 3 to 4 inches apart
Step 2: Add the Seeds
Drop 4 to 5 bean seeds into each hole.
This cluster planting technique creates compact, productive growing groups.
Step 3: Cover Gently
Lightly cover the seeds with loose soil.
Do not compact the soil heavily.
Beans germinate best in airy, moist soil.
Step 4: Space the Rows
Keep rows about:
- 18 to 24 inches apart
This spacing improves:
- Air circulation
- Sun exposure
- Disease prevention
- Harvest accessibility
Adding a Top-Dressing of Organic Fertilizer
After planting, apply a light top-dressing of composted chicken manure over the rows.
This works as a slow-release fertilizer every time you water.
The nutrients gradually move down into the root zone, feeding your plants naturally throughout the growing season.
You can also use:
- Finished compost
- Worm castings
- Organic vegetable fertilizer
- Compost tea
Avoid over-fertilizing with high nitrogen products because excessive nitrogen produces huge leafy plants with fewer beans.
Watering Yellow Wax Bush Beans
Consistent watering is essential for tender, productive beans.
Right After Planting
Water deeply after sowing seeds to help trigger germination.
The soil should feel:
- Moist
- Cool
- Never soggy
How Often Should You Water?
Beans generally need:
- About 1 inch of water weekly
- More during hot weather
- Consistent moisture during flowering and pod production
Irregular watering can lead to:
- Tough pods
- Poor yields
- Flower drop
- Misshapen beans
Best Watering Practices
Water at the Base
Avoid wetting the leaves unnecessarily because moisture on foliage encourages disease.
Water Early in the Morning
Morning watering allows leaves to dry quickly and reduces fungal issues.
Mulch Around Plants
Organic mulch helps:
- Retain moisture
- Reduce weeds
- Regulate soil temperature
- Improve soil health
Excellent mulch choices include:
- Straw
- Shredded leaves
- Grass clippings
- Compost
Germination and Early Growth
Yellow wax beans germinate quickly in warm soil.
You’ll usually see sprouts emerge within:
- 5 to 10 days
Warm soil temperatures around 70°F to 85°F produce the fastest germination.
Cold soil can delay sprouting and increase seed rot.
Caring for Young Bean Plants
Once seedlings emerge, maintenance is simple.
Keep Weeds Under Control
Young bean plants dislike competition.
Hand-pull weeds carefully to avoid disturbing shallow roots.
Avoid Overwatering
Too much moisture can cause:
- Root rot
- Yellow leaves
- Fungal diseases
The soil should stay evenly moist but never waterlogged.
Don’t Disturb the Roots
Beans dislike transplanting and root disturbance.
Direct sowing is always best.
Why Bush Beans Are Perfect for Beginners
Yellow dwarf wax bush beans are among the easiest vegetables for new gardeners because they:
- Grow quickly
- Require little maintenance
- Produce heavily
- Don’t need support structures
- Thrive in small spaces
- Germinate reliably
- Are highly rewarding
Even children can successfully grow bush beans with minimal experience.
Common Problems and Organic Solutions
Although wax beans are easy to grow, they can occasionally face challenges.
The good news is that most problems are easy to solve organically.
Problem: Poor Germination
Causes
- Cold soil
- Overwatering
- Old seeds
- Compacted soil
Solutions
- Plant after frost danger passes
- Use fresh seeds
- Improve drainage
- Warm the soil before planting
Problem: Yellow Leaves
Causes
- Overwatering
- Nutrient imbalance
- Poor drainage
Solutions
- Reduce watering frequency
- Add compost
- Improve soil structure
Problem: Flowers But No Beans
Causes
- Excess nitrogen
- High temperatures
- Lack of pollinators
Solutions
- Avoid high-nitrogen fertilizers
- Keep plants evenly watered
- Grow pollinator-friendly flowers nearby
Problem: Bean Beetles
Mexican bean beetles can damage foliage.
Organic Solutions
- Handpick beetles
- Use neem oil
- Encourage beneficial insects
- Remove infected leaves
Problem: Powdery Mildew
This fungal disease appears as a white powdery coating on leaves.
Prevention Tips
- Provide good airflow
- Avoid overhead watering
- Space plants correctly
- Remove infected foliage promptly
Companion Planting for Wax Beans
Companion planting helps improve plant health naturally.
Great companion plants for wax beans include:
Marigolds
Help repel harmful insects.
Nasturtiums
Act as trap crops for pests.
Carrots
Grow well alongside beans without competing heavily.
Radishes
Loosen soil and mature quickly.
Lettuce
Benefits from partial shading beneath bean foliage.
Plants to Avoid Near Beans
Avoid planting beans near:
- Onions
- Garlic
- Leeks
These plants can inhibit bean growth.
How Long Do Wax Beans Take to Grow?
Bush wax beans are fast producers.
Typical timeline:
- Germination: 5–10 days
- Flowering: 30–40 days
- Harvest: 50–60 days
Because they mature quickly, you can succession plant every 2 to 3 weeks for continuous harvests.
When to Harvest Yellow Wax Beans
Timing is everything.
The best wax beans are harvested when:
- Pods are smooth
- Bright yellow
- Tender
- About pencil thickness
Avoid waiting too long because oversized beans become:
- Tough
- Stringy
- Less flavorful
How to Harvest Properly
Harvest beans gently by:
- Holding the plant with one hand
- Snapping pods off carefully
Frequent harvesting encourages plants to continue producing.
The more you pick, the more beans you get.
How to Store Fresh Wax Beans
Fresh beans store well for several days.
Refrigeration
Store unwashed beans in a breathable bag in the refrigerator.
They usually stay fresh for:
- 5 to 7 days
Freezing Wax Beans
Wax beans freeze beautifully.
How to Freeze
- Wash and trim beans
- Blanch for 2 to 3 minutes
- Cool in ice water
- Drain thoroughly
- Freeze in airtight bags
This preserves flavor, texture, and color.
Delicious Ways to Eat Yellow Wax Beans
Fresh wax beans are incredibly versatile.
Popular cooking methods include:
- Steamed with garlic and butter
- Roasted with olive oil
- Stir-fried
- Pickled
- Added to soups
- Tossed into salads
- Sautéed with onions
- Mixed into casseroles
Their sweet, buttery flavor pairs beautifully with many dishes.
Saving Seeds for Next Season
You can easily save bean seeds for future planting.
How to Save Seeds
- Leave several pods on the plant until fully dry
- Allow pods to turn brown and brittle
- Remove beans from pods
- Store in a cool, dry place
Properly stored bean seeds can remain viable for years.
Why Organic Gardening Produces Better Beans
Organic gardening focuses on building healthy soil ecosystems rather than feeding plants artificially.
Healthy soil creates:
- Stronger roots
- Better disease resistance
- Improved moisture retention
- More flavorful harvests
Over time, your garden becomes increasingly fertile and productive naturally.
Raised Beds vs In-Ground Growing
Wax beans grow well in both setups.
Raised Beds
Advantages:
- Better drainage
- Warmer soil
- Easier maintenance
- Fewer weeds
In-Ground Gardens
Advantages:
- Larger growing area
- Better moisture retention
- Lower setup costs
Choose whichever method fits your space and budget.
Growing Wax Beans in Containers
Even apartment gardeners can grow bush beans successfully.
Use containers that are:
- At least 8 to 10 inches deep
- Well-draining
- Positioned in full sun
Container-grown beans may require more frequent watering due to faster soil drying.
Succession Planting for Endless Harvests
Want beans all summer long?
Instead of planting everything at once, sow new seeds every:
- 2 to 3 weeks
This creates staggered harvests and prevents overwhelming production all at once.
Avoid These Common Beginner Mistakes
Planting Too Early
Beans hate cold soil.
Wait until frost danger has passed completely.
Overcrowding Rows
Dense rows with poor airflow encourage disease.
Use proper spacing.
Overfertilizing
Too much nitrogen causes leafy growth but fewer beans.
Harvesting Too Late
Tender young pods taste best.
Pick regularly.
The Secret to Bigger Harvests
The biggest secret to high bean production is consistency.
Consistent:
- Watering
- Harvesting
- Weeding
- Soil health
…creates healthier plants and larger harvests.
Small daily attention produces enormous rewards in the garden.
Why Every Gardener Should Grow Wax Beans
Yellow wax bush beans are one of the most satisfying vegetables you can grow because they deliver:
- Fast results
- High productivity
- Amazing flavor
- Beautiful color
- Beginner-friendly success
- Excellent nutrition
- Low maintenance gardening
They fit perfectly into organic backyard gardens and reward even minimal effort with generous harvests.
Final Thoughts
If you’re looking for an easy, productive, and delicious vegetable to grow organically, yellow dwarf wax bush beans are hard to beat.
With rich soil, plenty of sunshine, consistent moisture, and the powerful cluster planting technique, you can transform even a small garden space into a highly productive bean patch.
There’s nothing quite like harvesting bright golden beans straight from your own backyard and bringing them fresh to the kitchen.
Whether you steam them with garlic, roast them until caramelized, pickle them for later, or snack on them fresh off the plant, homegrown wax beans deliver flavor that simply cannot be matched by store-bought produce.
So grab your seeds, prepare your soil, and start planting.
Your future harvest is waiting.
Watch: How To Grow Yellow Dwarf Wax Bush Beans In The Garden!

1. What are yellow wax bush beans?
Yellow wax bush beans are a variety of snap beans with tender, buttery yellow pods grown on compact bush-type plants.
2. How long do wax beans take to grow?
They typically take 50–60 days from planting to harvest.
3. Do wax beans need full sun?
Yes, they need 6–8 hours of direct sunlight daily for best growth and yield.
4. Can I grow wax beans in pots?
Yes, they grow well in containers at least 8–10 inches deep with drainage holes.
5. What is cluster planting in beans?
Cluster planting is growing 4–5 seeds in one hole instead of planting single seeds individually.
6. Why use cluster planting?
It improves germination, increases yield, and helps plants support each other naturally.
7. How deep should I plant wax bean seeds?
Plant seeds about 1 inch deep in loose, well-prepared soil.
8. How far apart should bean plants be?
Space clusters 3–4 inches apart and rows 18–24 inches apart.
9. What soil is best for wax beans?
They prefer loose, well-draining soil enriched with compost or aged manure.
10. Do wax beans need fertilizer?
Yes, but lightly. Use organic compost or composted manure, not heavy chemical fertilizers.
This website is a participant in the Amazon Services LLC Associates Program, an affiliate advertising program designed to provide a means for sites to earn advertising fees by advertising and linking to Amazon. Some of the links to products on this site are affiliate links. These are products that I've used or recommend based from homesteading experience. I do make a small commission (at no extra cost to you) from these sales. (alert-warning)